Monday, April 25, 2011

Pie in a Jar

I came across the cutest thing in the whole world... Check out these Pie's in a Jar..I thought these would be perfect for gifts, family get together, or put in the freezer and enjoy whenever you want!
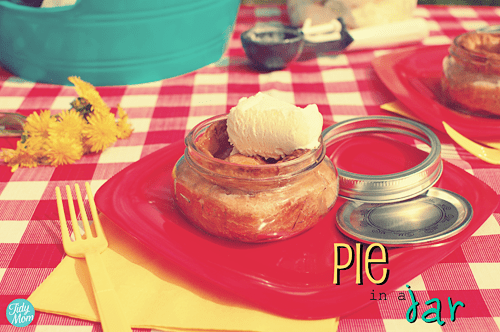
These are individual-sized pies made in little glass jars that can go straight from your freezer to your oven to your mouth. SO cute.  These are just about the best little gift from the kitchen you could share with someone!

So check this out....

Pie in Jar
This is the type of jar you’ll need.
They’re half-pint jars, but short and squatty instead of tall and skinny ( ha ha just how i want to be.. )   here is the link to buy them on Amazon.

Step 1: Pie Dough
The first thing you’ll need is dough. You can use any pie dough you like or link to homemade crust That particular recipe will make 4 jars.Or if you’re really want to make it easy, even a store bought crust will do.

Step 2: Make a topper and line the jar
Roll out a small handful of dough. This is just for the tops of your pies, so eyeball about that much. Grab the ring part of your jar and use that as your cookie cutter. Brilliant, right? Cut out the tops and set aside

Use the rest of the dough to line the jars. (No, you do not need to grease them) The great part is that there’s no rolling required! Just take little pieces and press them in. Make sure it’s pressed all the way up to the top of the jar, or pretty close to it.


Step 3: Fill ‘er up
You’ll need about 1/2 C filling for each jar. You can use any filling your little pie-craving heart desires, even canned!
Here’s the basic recipe (for 4 pies)
2 C prepared fruit (pitted, diced, peeled, etc.)
2 T sugar- brown or white (use more or less depending on sweetness of fruit)
2 T flour- (again, more if your fruit is super juicy like cherries, less if it’s pretty dry)
1 T butter (divided between the pies)
Seasonings/flavorings- cinnamon, nutmeg, vanilla and almond extract, citrus zest etc)

When your filling is all combined, divide it between the jars and dot a pat of butter on top (about 1/4 T)

pie in a jar instructions

Step 4: Top it offMake sure your “lid” has a vent so steam can escape. You can use a knife to make a couple of slits or a tiny cookie cutter to make it decorative..


When your topper is ready, slip it onto the top of the pie. It will be large enough that the outside edge goes up the side of the dough-covered jar a bit, as show in the picture below. Then use your finger, or a fork (as seen above), to press the 2 pieces of dough together to seal. And nobody even think about mentioning the state of my fingernails.

Another option is to do a crumb topping. I put a basic crumb topping on my cherry pies and they were sooo yummy
**Crumb Topping (for 4-6 pies)
1/4C brown sugar
1/4 C flour
2 T oats
1/4 T cinnamon
3 T cold butter
Combine sugar, flour and cinnamon. Cut in butter. Add oats and stir to combine.
** Optional step here that I HIGHLY recommend: Brush pie tops with butter and sprinkle with sugar at this point. Yumminess highly intensified!


Step 5: Freeze ‘em!
Ready for this? When your pies are all done and topped, place metal lids back on and seal them tight
Then pop these little cuties in the freezer. There they will stay until you find yourself having an insatiable craving for home-baked goodness. You’ll be reaching for the crumbs at the bottom of the keebler box when suddenly your eyes will light up because you remember you have THESE sitting in your freezer.
Or when you have unexpected guests in need of impressing, or a friend needing to be cheered up, or it’s Thursday…I can think of a million reasons why one should have a constant supply of fresh pie in the freezer.

Step 6: Bake ‘em
Now first let me say that one of the biggest concerns from everyone is about the jars breaking in the oven. All I can say it that I’ve baked hundreds of these and never once has a jar broken. These are canning jars- they are designed to be boiled, pressure cooked, etc. So it’s different than putting any ol’ piece of glass in the oven. They bake just fine! But if you’re freaking out then my advice would be this: remove lids from jars and place jars on a baking sheet. Place baking sheet in a COLD oven. Then turn the oven to 375. That will give the jars a chance to warm up slowly as the oven preheats. If you’re really worried you can always let them sit at room temp for a bit first before putting them in a cold oven. Bake for about 50-60 minutes, or until the tops are golden brown and the middles are bubbly. If you’re baking them fresh and not frozen they take about 45 minutes.

pie in a jar favors

Idea and Recipe found ourbestbites and greenweddingshoes I found a lot of links, recipes and stuff on the Internet..

Are these not the cutest things youve ever seen??
Thanks for Visiting, Esther

Thursday, April 21, 2011

Easter Meal Recepies

Easter Meal Ideas... I found  most of them on one of my favorite recipe sites...

if you havent been to her site you need to!!
I just made my whole meal from her site... ;)

Breakfast -
Chocolate Mascarpone Stuffed French Toast with Strawberry Syrup

This one I'm sooo excited for!!
Chocolate Mascarpone Stuffed French Toast with Strawberry Syrup
1/2 cup mascarpone, at room temperature
1 tablespoon heavy cream
1 tablespoon orange zest
1 tablespoon granulated sugar
1 ounce semisweet chocolate, melted and cooled, plus more for grating
12 slices day-old brioche, about 3/4-inch thick (I used thick cut french bread)
3 large eggs
1 1/2 cups half-and-half
2 tablespoons unsalted butter, divided, plus more if needed
Confectioners' sugar, for dusting
Strawberry Syrup, warmed, recipe follows
      Cook's Note: Mascarpone is similar to cream cheese in flavor (but better) and has the consistency to match. It makes a great base for this super-easy yummy filling.
     Combine the mascarpone, heavy cream, orange zest and sugar in a bowl. Add the melted chocolate and mix until all the ingredients are incorporated. Using an offset spatula or butter knife, take a generous scoop of the chocolate-mascarpone filling, about 2 tablespoons, and slather it on 1 slice of the brioche, and then top with another slice of brioche. Repeat with the remaining slices and filling; you will make 6 sandwiches.
     In a shallow dish, whisk together the eggs and half-and-half to make an egg bath. (If you don't have half-and-half, milk or heavy cream will work just fine.)
    Preheat the oven to 200 degrees F.  Preheat a nonstick griddle or large skillet over medium heat. Add 1 tablespoon butter to the skillet, moving it around to coat the surface. Dip each sandwich in the egg bath, turning over to coat and soak both sides. Place the sandwich on the hot griddle. (Place only as many sandwiches as will fit easily on the griddle, don't overcrowd.) Cook, in batches, until golden, 2 to 3 minutes per side. Transfer the sandwiches to an oven-safe platter and cover loosely with foil. Place in the oven to keep warm. Add more butter to the griddle, as necessary, and cook the remaining sandwiches.
    Cut the sandwiches diagonally in half, and serve 2 to 3 halves per person. Dust the sandwich with confectioners' sugar and grate chocolate over the top. Ladle a generous portion of the Strawberry Syrup over the sandwiches, or serve alongside for your guests to serve themselves.

Dinner / Lunch - We will be having a BBQ...
 Firehall Steak Marinade

Firehall Steak Marinade½ cups Olive Oil
¼ cups Brown Sugar
4 cloves Garlic, Peeled And Halved
3 Tablespoons Balsamic Vinegar
3 teaspoons Montreal Steak Spice
1 teaspoon Dried Mustard
1 teaspoon Fresh Ginger, Grated
½ cups Teriyaki Sauce (I Use Kikkoman)
4 whole Steaks (strip Loins, Flank Or Other)
      Combine ingredients in a large Ziploc bag (don’t be like me—make sure there are no holes in the bag!), close bag and squeeze to mix the ingredients. Add 4 medium striploin steaks (or your choice of beef steak) to the bag and seal. Place in the refrigerator for 1 hour or even overnight to marinate and then grill the steaks as you normally would. Steaks can be frozen in the marinade as well, just defrost them in the refrigerator and grill. Recipe can also be doubled to increase the amount of marinade. Enjoy! This also works great on chicken and pork!
Found just the 6 of us

....Easy Tasty Garlic Bread  


Easy, Tasty Garlic Bread1/2 cup butter
1 1/2 tablespoons garlic powder
1 tablespoon dried parsley
1 (1 pound) loaf Italian bread, cut into 1/2 inch slices
1 (8 ounce) package shredded mozzarella cheese

       Preheat oven to 350 degrees F.In a small saucepan over medium heat, melt butter and mix with garlic powder and dried parsley. Place Italian bread on a medium baking sheet. Using a basting brush, brush generously with the butter mixture. Bake in the preheated oven approximately 10 minutes, until lightly toasted. Remove from heat. Sprinkle with mozzarella cheese and any remaining butter mixture. Return to oven approximately 5 minutes, or until cheese is melted and bread is lightly browned.


Found here  just the 6 of us

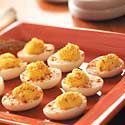
Best Deviled Eggs 

 
Found tasteofhome


For Dessert...... Spiced Carrot Cake


Directions

  • Slice eggs in half lengthwise; remove yolks and set whites aside. In a small bowl, mash yolks. Add the next 10 ingredients; mix well. Evenly fill the whites. Garnish with parsley and paprika. Yield: 2 dozen.

Monday, April 18, 2011

Bloggie!!!


I wanted to share my new toy... I love to always have my Camera on me, i always keep my small one on me but my 5 year old has claimed it hers... SO.... I got me a new one to keep in my Purse or Diaper Bag.

so Introducing..... my new toy....

Sony Bloggie Touch 4GB HD Pocket Camcorder

Highlights: 8GB, Full HD 1080p video, 12.8-megapixel stills, 3.0" (diag.) touch screen, flip-out USB arm, MP4 video format, works with iMovie®
and you can easily upload your movies to your favorite social networking sites like Youtube and Facebook1.
 
Just something so fun.. I love that it is a Video Camera and it takes Pictures... :)


Thanks for Visiting, Esther

Thursday, April 14, 2011

MeatLoaf

I love meatloaf..... A lot of People do not... specially my family, so I always have to order it when we go out....

But ya know what?!! Im goign to give it a try!! lol wish me Luck!!


Ingredients

  • 3 thick slices white bread, torn into large pieces
  • 2 garlic cloves, chopped
  • 1 medium onion, chopped
  • 1 celery stalk, chopped
  • 1 medium carrot, chopped
  • 1/2 cup flat-leaf parsley
  • 12 ounces ground beef chuck (90 percent lean), preferably pasture-raised
  • 12 ounces ground pork, preferably pasture-raised
  • 12 ounces ground veal, preferably milk-fed
  • 1 large egg
  • 3/4 cup ketchup
  • 1 tablespoon Dijon mustard
  • 1 tablespoon Worcestershire sauce
  • Coarse salt and freshly ground pepper
  • 2 tablespoons light-brown sugar

Directions

  1. Preheat oven to 375 degrees. Pulse bread in a food processor until finely ground. (You should have about 2 1/2 cups breadcrumbs.) Transfer to a medium bowl.
  2. Pulse garlic, onion, celery, carrot, and parsley in food processor until finely chopped. Add to breadcrumbs. Add meats, egg, 1/4 cup ketchup, the mustard, Worcestershire sauce, 1 tablespoon salt, and 1/2 teaspoon pepper; mix together using your hands. Transfer mixture to a 5-by-9-inch loaf pan.
  3. Stir together remaining 1/2 cup ketchup and the brown sugar until smooth; brush onto meat. Set pan on a rimmed baking sheet, and bake until an instant-read thermometer inserted into the center reaches 160 degrees, about 1 hour 20 minutes. Let cool slightly.

Till Next Time, Esther

Tuesday, April 12, 2011

Activity Pages for Easter

Head over to Family Fun Disney for these fun free printables!!

Hunt for Easter Eggs!

Easter Bunny Game & Coloring Page


Till Next Time, Esther

Fun Kids Easter Crafts

 My Kids LOVE love Love Crafts... So I'm always on the lookout for new fun and exciting craft.. oh and did I mention easy and inexpensive..

Check out these cute Kids ideas i found we will be making in the next few week!! ( if all my ideas make it through spring break.. ;)


#1 - Beady Babies
Beady Babies 
Materials
  • 2 round wooden beads (we used one 16-millimeter and one 25-millimeter bead) with holes large enough for a doubled Pipe cleaner to fit through
  • 6-inch pipe cleaners
  • Acrylic paint
  • Craft feather
  • Fine-point marker
Instructions
  1. First, paint the beads with acrylic paint. When they have dried, bend a 6-inch pipe cleaner in half, sandwiching the end of a tiny craft feather in the fold.
  2. Thread the smaller bead onto the opposite end of the pipe cleaner and slide the bead up to hide the bottom of the feather.
  3. Thread the larger bead onto the pipe cleaner, then bend the ends of the pipe cleaner into feet.
  4. Finally, use a fine-point marker to give your little chick eyes and a tiny beak
 #2 Barn Yard Cuties
Barnyard Cuties
This barnyard trio makes a great project for Easter,
 but the roly-poly pals are fun to play with any time of year.
              Materials
  • 3 Styrofoam eggs
  • Tacky glue
  • Fluffy, curly, and smooth yarn
  • Scissors Felt
  • Black ball-head straight pins
  • Extra-fine permanent marker

            Instructions


  1. Flatten the rounded end of each egg by pressing it on a hard surface. Hold this end and drizzle glue on the opposite half. Press the end of the yarn into the glue at the egg's tip and spiral it around the egg. When you reach the midpoint, cut the yarn.

Barnyard Cuties - Step 1

2.Apply glue to the egg's uncovered half and wrap as before,
 again working toward the middle.

3. Cut ears, a pig nose, and faces from felt. To make ear creases, dab glue on the ear's bottom edge and pinch from the back. Pin the creases in place until the glue sets
Barnyard Cuties - Step 3

Glue the ears and pig nose to the faces and attach the faces to the eggs' flat ends.
 Use ball-head pins for eyes, then draw on noses and mouths with a marker.

#3 - Sock Hop
Sock Hop
Until we figure out where missing socks actually go when they vanish from our laundry baskets, here's a way to get some use from the singleton left behind.
Materials
  • Spoon or funnel
  • Dried lentils
  • Child's sock
  • Rubber band
  • Ribbon
  • Scissors
  • Felt
  • White pom-pom or cotton ball
  • Tacky glue
Instructions
  1. To make your own bunny beanbag, use a spoon or a funnel to add dried lentils to a child's sock, filling it up just past the heel. Close the sock with a tightly looped rubber band.
  2. To create the head and neck, tie a ribbon around the sock just below the heel.
  3. Use scissors to cut the sock's cuff into two ears, rounding the edges to give them the right shape.
  4. Cut a nose, teeth, and eyes from felt. Attach the facial features and a white pom-pom or cotton ball tail with tacky glue

Monday, April 11, 2011

The Perfect Boiled Egg

How do you boil the perfect Egg? Well it seems everyone has an opinion or Idea... here are a few Ideas so you can decide what you like best.

1st up...  Cooking with Tom

How long to boil an egg... Ive heard 3 min, 4 min 7 min.. etc... seems everyone has their Ideas.... I love cooking with Tom. You see him on Good Things Utah.

here is what he has to say......
What method do you use to make a perfect hard boiled egg?A "perfect" hard boiled egg is one defined as an egg with a tender yet firm egg white, a creamy yet cooked egg yolk, and no green/gray ring around the outside of the yolk.  The trick to a "perfect" egg is this:
-Buy your eggs one week before you plan on cooking them.
-Start your eggs in cold water.
-Use a candy/meat thermometer and keep the temperature of the water between 175 and 185 for 25 minutes
-Immediately immerse your eggs into cold water.
To see more of how he came up with this his research is found on
His Website... cook with tom

#2  About.com
  1. Place eggs in single layer in saucepan.
  2. Cover with at least one inch of cold water over tops of shells.
  3. Cover pot with lid and bring to a boil over medium heat.
  4. As soon as the water comes to a full boil, remove from heat and let stand.
  5. Large soft-cooked eggs: let stand in hot water 1 to 4 minutes, depending on your tastes.
  6. Large hard-cooked eggs: let stand in hot water 15 to 17 minutes.
  7. When cooked to desired level, drain off hot water.
  8. Immediately cover with cold water and add a few ice cubes.
  9. Soft-cooked eggs: let stand in cold water until cool enough to handle. Serve.
  10. Hard-cooked eggs: let stand in cold water until completely cooled. Use as needed.

Tips:

  1. Never boil eggs. It makes them rubbery.
  2. Use older eggs. Fresh ones won't peel properly.
  3. To keep eggs from cracking while cooking (before placing in water), pierce large end with a needle, which will also make them easier to peel.
Steps found Here


Well i can say I've learned way more than i want to know about eggs.. Ha ha..
Good Luck with you East eggs!!


Till Next Time, Esther

Wednesday, April 6, 2011

10 Great iPad Apps for Pre-schoolers


I'm always looking for some fun and educational activity for my kids. I got a new ipad last year and I Love it!!
This is my 2 year old on it... :)


iPads for preschoolers? Believe it or not, this latest gadget from Apple isn't just for grown-ups. Children are naturals when it comes to touching, moving and exploring everything they see, making the iPad perfectly suited for those young minds and hands. Reach out and touch something you like, swipe it out of the way to move it, and then go on to something else. It’s child’s play! But the iPad is also a great teaching tool for their children. Many of the apps are just $.99 to download, and some are even designed for babies. Still, people are realizing that this kind of consumable, portable and dynamic technology is ideal for engaging not only adults but kids as well in new ways to learn. The iPad is a fun and interactive way to teach your preschooler everything from shapes to colors to numbers and counting! Here's our list of top iPad apps for your budding learner:
  • My Very First App: ($.99) You’ll instantly recognize the colorful illustrations in this app based on Eric Carle’s My Very First Books series. Kids as young as one can immediately dig right in and play games that match colors with pictures. As your child grows, she can try more sophisticated memory-matching games. Choose from three levels of play for children from 1 to 3 years old.
  • Thomas & Friends: ($2.99) Thomas pulls into the iPad station with three simple yet entertaining game offerings. The app has drag and drop puzzles of engines, train track mazes, and a game of concentration—with pictures of engines, of course.
  • Curious George’s Dictionary: ($4.99) Children can swipe their fingers over the screen for pictures and audio of alphabet letters, matched with art from classic Curious George books. They can touch words on the screen to get dictionary definitions and have sample sentences read to them. Other featured concepts include colors, shapes, numbers, and opposites.
  • Colormixer: (Free) This app encourages exploration with color. Simply touch the screen and play with the bands of colors by moving and mixing them around with your finger. An app like this is a great alternative to ones that practice letters and numbers because it promotes creativity and introduces color concepts.
  • Interactive Baby Sound: ($.99) What more could a baby want than to touch a picture of a pig and hear it say oink? When each colorful picture is touched, your child hears an appropriate sound for the object. Animal sounds include a dog, cow, duck, cat, frog, tiger, and pig. Transportation sounds include a plane, bus, train, car, ship, fire truck, and ambulance.
  • Baby Peekaboo Cards: ($.99) This peekaboo game grows with your child because there are so many cards to uncover. They are arranged from the simplest to the more complex, so the app can be used for 1 to 4 year olds. Uncover a card by swiping away an object on the screen to reveal the hidden picture below. Then scroll to the next screen by swiping to the right. It’s so easy a baby can do it.
  • Voice Toddler Cards: ($.99) This app has over 500 colorful photo flashcards for the youngest children—or even those learning English as a second language. A voice names each picture as it comes on the screen. Everyday concepts include numbers, letters, familiar objects, games, sports, animals, foods, shapes, and colors.
  • Toddler Quiz Flashcards: ($.99) Has your toddler ever taken a quiz? Don’t worry. There will be no performance anxiety here. The app displays four pictures at a time and a voice names one of them for your child to identify and touch. There’s no time pressure, and no designated ending. Start and stop when you wish.
  • Catch & Count: ($.99) Catch some decorated eggs in a little red truck. It’s as easy as that. Set the game to drop 10, 20, 50, or even 100 eggs. A voice names the numbers as eggs are caught, or the voice can be turned off.
  • Tam & Tao in Numberland: ($9.99) In addition to counting, children can learn to write numbers. Arrows show which way your child should move her finger to form the numbers on the screen. And children can then draw the numbers on their own. Colorful backgrounds of jungle, space, or seashore themes help decorate the scene.
When introducing an app to your child, model how to play the game, then sit back and let her explore it herself. As technology becomes more accessible to everyone, preschoolers should be no exception. You may find that the biggest problem with introducing your child to the iPad is prying it out of her hands so you can use it!  
What's more, most games have a “lite” version that can be downloaded for free. These lite apps are often a shortened version of the full game, usually with fewer levels, activities, or screens, but still make good options if you're not looking to spend any money. Whip that iPad out and start learning!


Both my 5 year old and 2 year old LOVE it!!
Great Apps for them, and helps keep learning fun!!
Later ill be posting for other grades. I'm up to 5th grade so ill post those shortly.
Till Next Time, Esther

Tuesday, April 5, 2011

On my Wish List.....

There are so many fun and exciting crafting tools out there.... :) So many i dont have and really really want... here is one on my list...
#1 The Cinch binding System...

  1. The Machine: The Cinch weighs 7 pounds and features a rubber cushioned handle grip that locks into place for easy storage and mobility as well as an adjustable closing mechanism for binding any size wire.
  2. The Holes: Cinch holes are round, causing less friction and allowing pages to turn easily. The disengage-able pins in the Cinch system give you the freedom to pull out any knob to prevent that hole from being punched--punch any number of holes in any configuration down to one if you want! Holes are 2:1 pitch which means there are two holes per 1 inch, so they're compatible with both spiral and plastic wire.
  3. The Pages: Pages can be any length-- as little as 2 " or projects 12" or more! Easy to follow instructions and charts printed on the tool base help you determine which pins to pull for any size paper while a sliding measurement guide and alignment peg ensure evenly spaced holes no matter the length of your project. You can punch up to 20 sheets of copy paper at once and a large and easy-to-empty waste bin help prevent clogs caused by too much waste. Projects lay flat while punching for control and precision (as opposed to being punched vertically).
  4. The Binding: Wire binding hooks on the side of the machine hold your empty wire in place so you can easily thread your punched covers and pages. The cinching bar in the back of the machine holds the wire binding in place and then compresses it to the desired diameter.

Ive seen it... but always walked past it becuase of so many other things on my list... But when My Daughter Madison and i went to Roberts Craft night and we got to use it .. I decided.. its NEXT on  my list.. It was sooo fun and easy to use.


Do you have one? What are your thoughts


Till Nex Time, Esther

Monday, April 4, 2011

Envelope Bunnies

One great way to say Happy Easter is with paper-envelope rabbits
 -- bearing treats, of course. 
  
Envelope Bunnies
Easy Directions....

1. Seal the flap of an envelope, and draw bunny ears on the sealed side, as shown below. You can draw your own or use our bunny ear template

2. Cut along the line through both layers of the envelope

3. Flip the envelope over; what was the side of the envelope becomes the bottom of your treat holder. 

4. Cut pink construction paper to make eyes and insides of ears, and glue them on the front of the envelope. Use colored pencil for mouth; glue on a pom-pom nose. Fill with yummy Easter sweets.

Read more at Marthastewart.com: Envelope Bunnies - Martha Stewart Crafts


Till Next Time, Esther

Friday, April 1, 2011

Treat Buckets!


I had to share these i think it is a GREAT Idea, and mya just help the kids, well the whole family interested and litening to Conference!!


Treat Buckets.. found at brownpaper--packages.

This idea isn't just for General Conference...it could also be used in any kind of classroom setting--from home, to school, to church!
But here is how she used them...

*Decide on words we wanted the kids to listen for during Conference--prophet, temple, faith, scriptures, and family--then I added one word to the front of each bucket in vinyl (font = Wish I Was Taller) . You could also use stickers, rub-ons, or print the words on cardstock then mat them on scrapbook paper and attach them with double stick tape. I tied ribbon around the handle for a fun accent.

* filled each bucket with the kids' favorite candy...
*During conference,  line the buckets up along the hearth, end table, whereever you want and then anytime they hear one of the words on the bucket, they can come and take a piece of candy. I also give them a cup with their name on it to put their candy in, although not much makes it into the cup, lol.


Such a good Idea, i sure hope you enjoyed it!!

Till Next Time, Esther

April Fools!!


April Fools is such a fun holiday!! So here are a few fun ideas to share with your family today!!

#1 - Check out these   Fakin' and Eggs... For Dessert???  


Guess what this is made out of??.... Candy!! Click the link above for instructions. :)


#2 - I LOVE free Printable, so how bout these really cute Gotcha Tags...


#3 This is cute From family fun.
Fake Spaghetti and Malt Balls

#4 - I totally LOVE this free Printable for the Kiddos....
from Family Fun 
This might help them get their chores done!! ;)

April Fools' Prank: Chore Camp Brochure

#5 -  April Fools' Career Quiz
With these made-up careers, kids will get a kick out of this silly quiz.

April Fools' Career Quiz


Wishing you all a Happy, and Fun April Fools!!


Till Next Time, Esther